Step 1: Ensure Network Profile is set to Private
Press Windows Key  +I Click Change PC Settings Click Network
Click manage
Click on the Network to Share
To Change the Network type to Private
Click on the Slider Button to turn on Sharing
Step 2: Change Advanced Sharing Settings as required
Open Run Prompt (Windows Key  +R) Type ncpa.cpl and Click OK
Expand Private (Current Profile)
Turn ON Network Discovery........................................................................................................................ 4
To Turn ON Printer and File sharing ........................................................................................................ 4
Turn ON Password Enabled ......................................................................................................................... 4
Turn ON Network Discovery
Click Turn on network discovery radio button
Check Turn on automatic setup of network connected devices
To Turn ON Printer and File sharing
Click Enable Turn On file and printer sharing Radio Button
Turn ON Password Enabled
Click All Networks to Expand
Click on Turn off password protected sharing
Click Save Changes
Step 3: Share the Folder
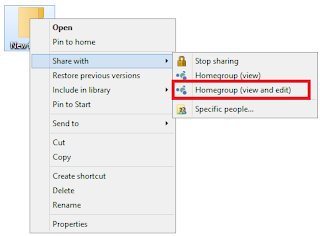
Sharing Specifically with Homegroup
Right Click on the Folder to share
Point to Share With and Select the Sharing Options
To Provide read Only rights for users on homegroup
Click Homegroup (View)
To allow permissions to Read and Modify files
Select Home group (View and Edit)
Right Click on the Folder and Click Properties
Click on Security tab
Click Edit beside to change permissions, Click Edit.
Type everyone and Click OK
Click on Full Control Check box Under allow
<![if !vml]>

<![endif]>
Click Apply and OK Click on Sharing tab
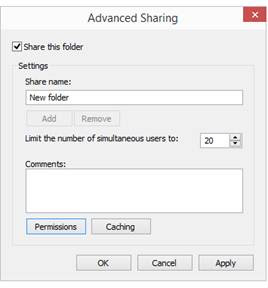
Click on Advanced Sharing
Check (ü) Share this Folder
Click Permissions
Click on Apply and OK Click on Apply and OK


